At various points throughout this degree course so far I have experimented with black and white film in a 4×5 large format camera (though I have not yet used it for this particular landscape module, but will as soon as opportunity permits). Although I did not eventually use them, because the colour set that I shot digitally worked better than the monochrome analog images, I did make a number of pictures for one of the I&P assignments. The work that I did for I&P has just been assessed and the assessors have picked up on that work and have offered encouragement for further experiments with this medium. I already had the intention of doing some more landscape work using that camera but the encouragement is welcome.
With that existing intention in mind, one thing I had already decided to look at is the use of filters. I noted when reading Adams’s book (1983) that he often used coloured filters to achieve certain effects. I already have a few neutral density, mostly graduated, filters that I use from time to time with a couple of the lenses on my Canon. I recently decided that it would be useful to have an extra set of lens adapters for another couple of lenses that are of a different diameter and one that would fit my 4×5, and came across a fairly cheap but reasonable quality set (stuff made by the likes of Cokin, some of which I already have, is great quality but also pretty expensive) that includes an array of coloured, and graduated coloured, filters, so though I would give them a go.
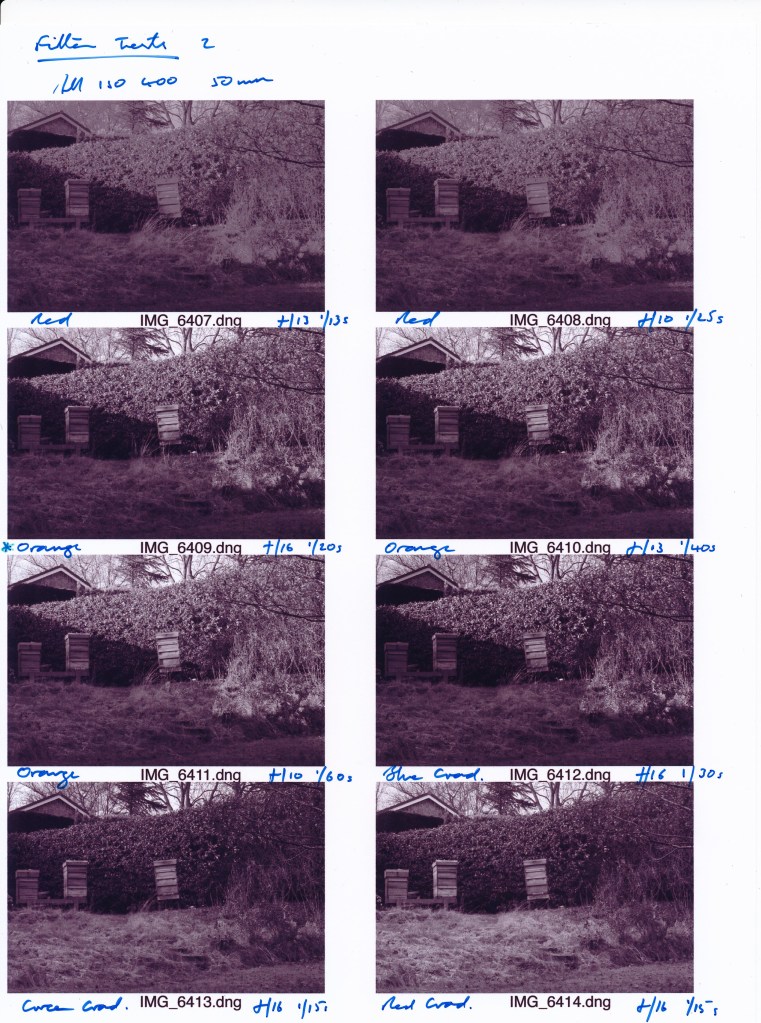
I am already reasonably familiar with ND grad filters but need to experiment with the coloured filters to see what they will do when shooting black and white. (I do not see much if any need for using them when shooting in colour unless I decide to go for some weird effects, which is pretty unlikely: in the set there is, for example, a purple filter that I cannot imagine I will ever use!) To start with therefore, as b&w 4×5 sheet film is not particularly cheap and as it takes more time to set up a shoot, then develop and print the film, I have used my Canon set to b&w mode. I started with a shot without filter to act as a baseline for comparison then worked through a number of shots, at different f stops for comparison of the effect on shutter speeds, using four solid coloured filters (the ones that expect will be the most useful) – blue, green, red (the primary elements of natural light), and orange as a sort of softer version of red. As the light conditions were fading when I did this test I only managed three grad filters, just the primary colours.
At first it seemed odd to use colour filters when shooting b&w but thinking about it I realised this is a matter of fairly simple physics. Taken in isolation each of the three primary colours of light is capable of absorbing the other two. As a result any given colour will be accentuated and lightened while the other two will be darkened. A coloured filter can therefore change the tonal balance of the colours as they appear in b&w. For example, take a red barn in a green field: a red filter would brighten the barn and darken the field, placing more emphasis on the barn; a green filter would darken the barn and give more emphasis to the grass. In this way, without having to resort to post-production digital manipulation, or burning and dodging, for example, when printing manually from a negative, certain effects can be applied from the outset in camera before the image is made in order to emphasise certain elements of the composition.
Here are a couple of contact sheets that I have made of these first tests, annotated to identify the colour of each filter, aperture and shutter speed setting.
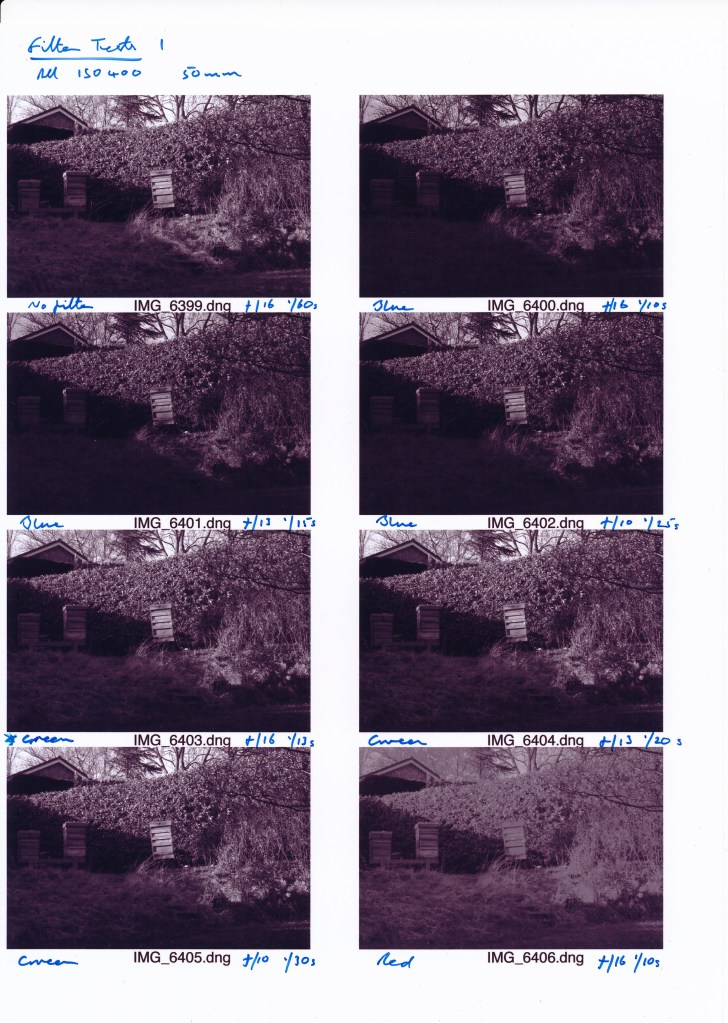
Unfortunately these scans do not really do the test justice but it is immediately apparent that there are a number of significant differences. What stands out first is that the blue filter significantly darkens the scene (a corner of my garden where I keep my beehives; in colour terms the hedge is beech so the leaves are at this time of the year russet, the hives are pale but reddish wood, the grass in the foreground is still quite green but starting to bleach out for the winter, the sliver of sky at the top was quite strongly blue; to start with the sun was bright so the shadows were fairly strong). The green filter lightened the foreground and introduced a bit more contrast into the hedge and the hives. The red has produced an odd even but washed out tone that looks completely unnatural. The orange filter (which I would regard as simply a lighter shade of red for present purposes) though has produced a much softer effect, keeping some of the strong shadows but bringing out more detail in the shaded areas. Of the four solid coloured filters this is the one that I think worked best in these particular light conditions for this view.
Because the light was changing so quickly when I switched to the grad filters I cannot regard the results as wholly representative but what I do find interesting is that the red filter has brought out more detail across the tonal range, much more so than the blue or green. What this does at least suggest though is that the red grad filter might be useful to accentuate tonal differences when the light is otherwise fairly flat and not creating much contrast.
The other obviously striking thing is the effects on shutter speeds which will obviously have to be factored in when using the 4×5 in earnest.
Despite the relative expense I think the next step is to take some test shots on the 4×5 and print them up properly (I am now close to having a working darkroom) for better comparisons. I am also going to try with my medium format Hasselblad film camera that I also use for landscape based work from time to time (at least 120 film is cheaper and less fiddly to develop!) but I first need to make a special adapter to fit the filter holder to the lens, a Zeiss 80mm F lens. Rather unhelpfully this lens does not have a thread on the inside of the front rim, as most lenses do (even the old Rodenstock I use on my 4×5 does), to which the adapter ring can be screwed. I therefore need to make a ring that will fit the outside of the rim and lock against the raised lips that otherwise hold the lens cap on. As if I have got nothing better to do!
Adams, A, (1983). Examples: The Making of 40 Photographs. Boston: Little, Brown & Co
